
I was recently asked by a lot of people where I got the template for this birth plan I put together for our as not yet even decided for, third baby. Can you say that I am a planner? As a VBAC (Vaginal Birth After Cesarean) I had to do a lot of research and in my journey, I discovered a lot about the science that influences how a birth is handled, the studies behind it, and the recommendations by ACOG (American College of Obstetricians and Gynecologists). I realized that the evidence suggests things in L&D be handled a LOT differently than they actually are. Which prompted me to create this. Because I am asked about it so much, I decided to post my FIRST ever blog on the topic, with the graphics I made for said birth plan, so others can use it too! Hope you enjoy.


Like the one above this means only some monitoring of your baby every hour, but unlike the one above, this one still uses the electronic fetal monitoring.


(this is another form of monitoring for your baby while you labor, however this unit is usually wireless.)


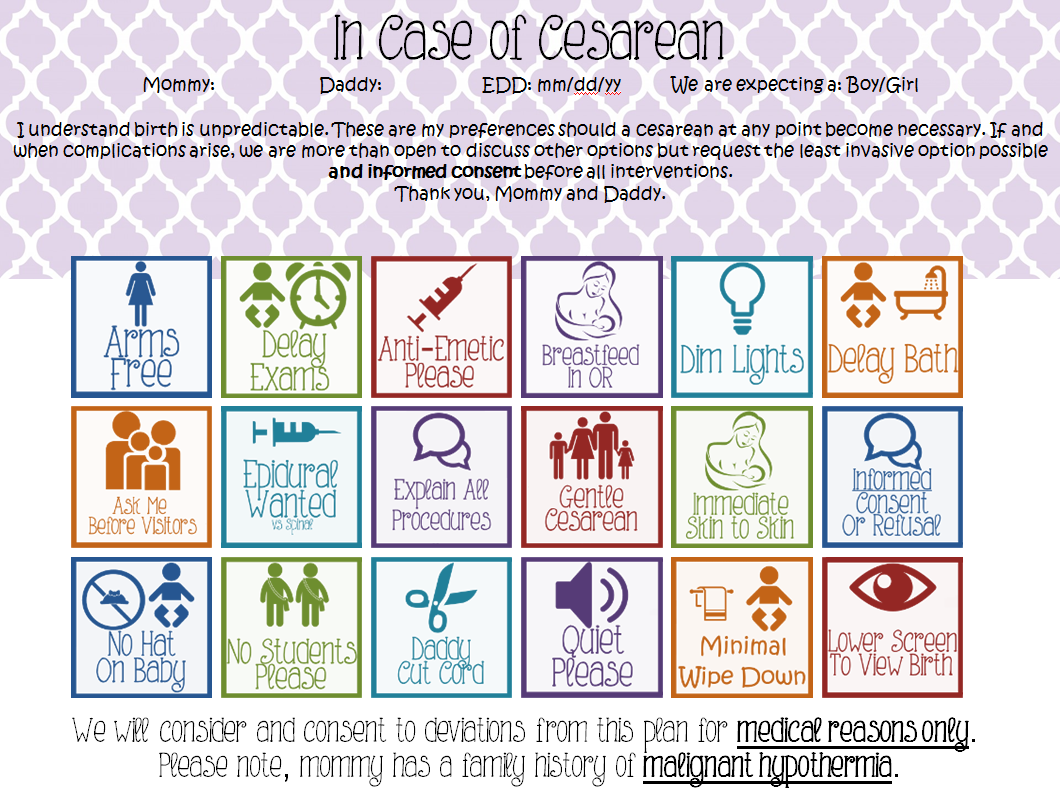
These next few are obviously for a cesarean, but the above can still be used for a cesarean birth plan as well.


These are the icons that I have created. If you have any requests for anything specific, feel free to contact me and I can put new ones together.
To put the plan together, I used Powerpoint. I am sure you can use Microsoft Office, but I used powerpoint because it's actually really easy to use. Here's the tutorial for how to change the colors. :)

Step Two. Chose the option titled "Picture"

Step Three. Once you chose the option Picture, this will open up your computer's inventory of photos. Chose the one you want to insert.

I chose informed consent for this example simply because Informed Consent is very important and often neglected.
Step Four, you should now be looking at something similar to this. Select the option titled 'Recolor'. I have it circled in red.

Chose your color. and it will change color.

Then, to resize, select the little tiny dot at the corner of the picture.

And move the dot. it makes it bigger or smaller.

Repeat with each picture.


